Save to Pinterest
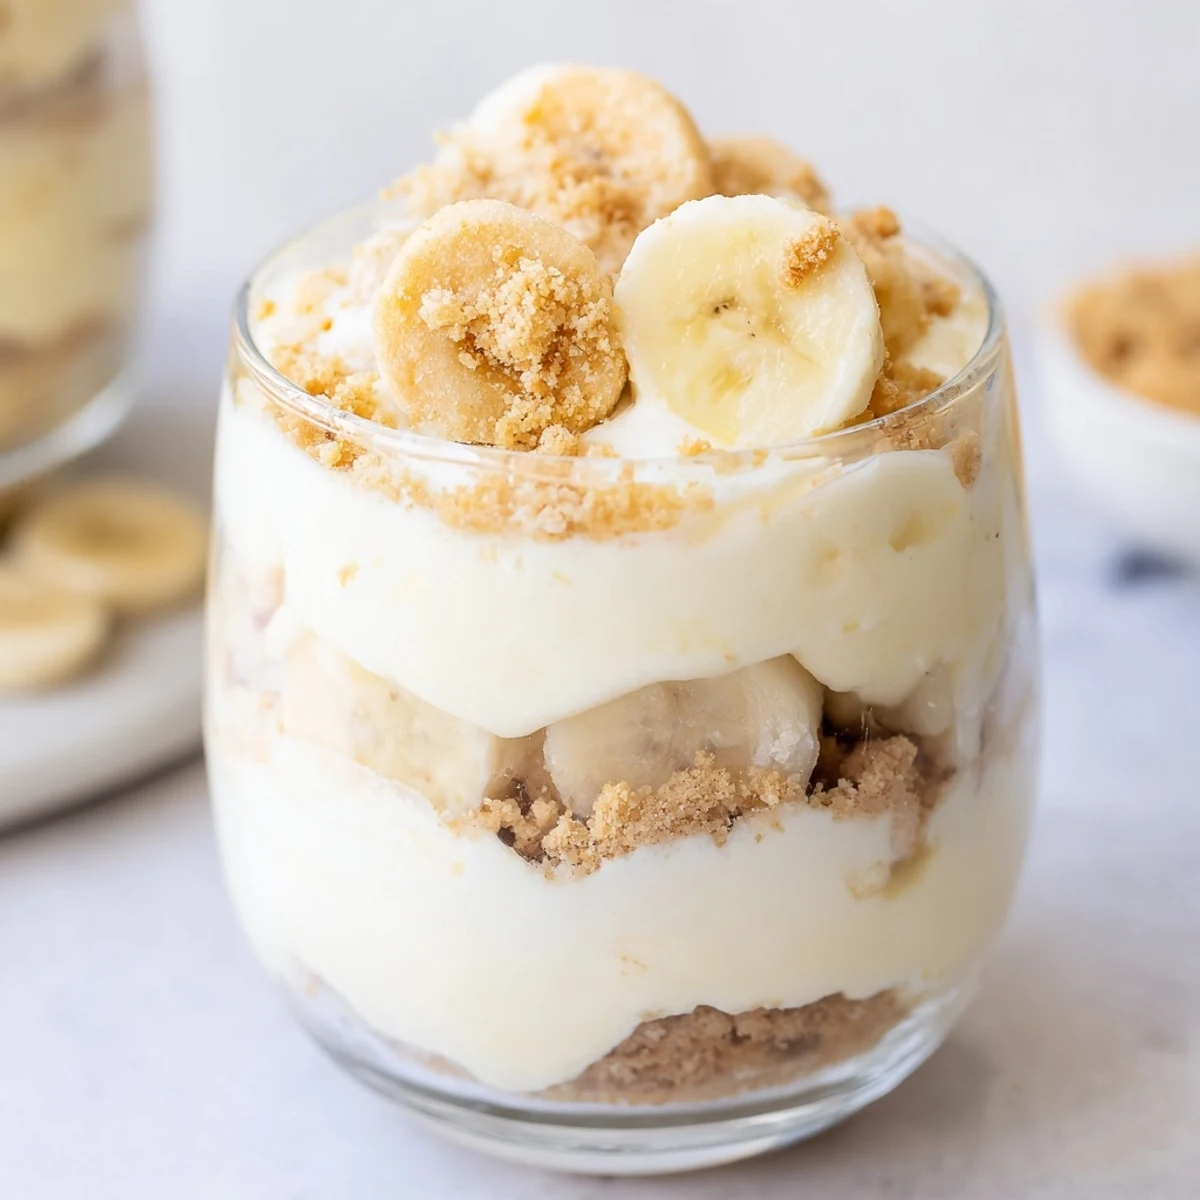
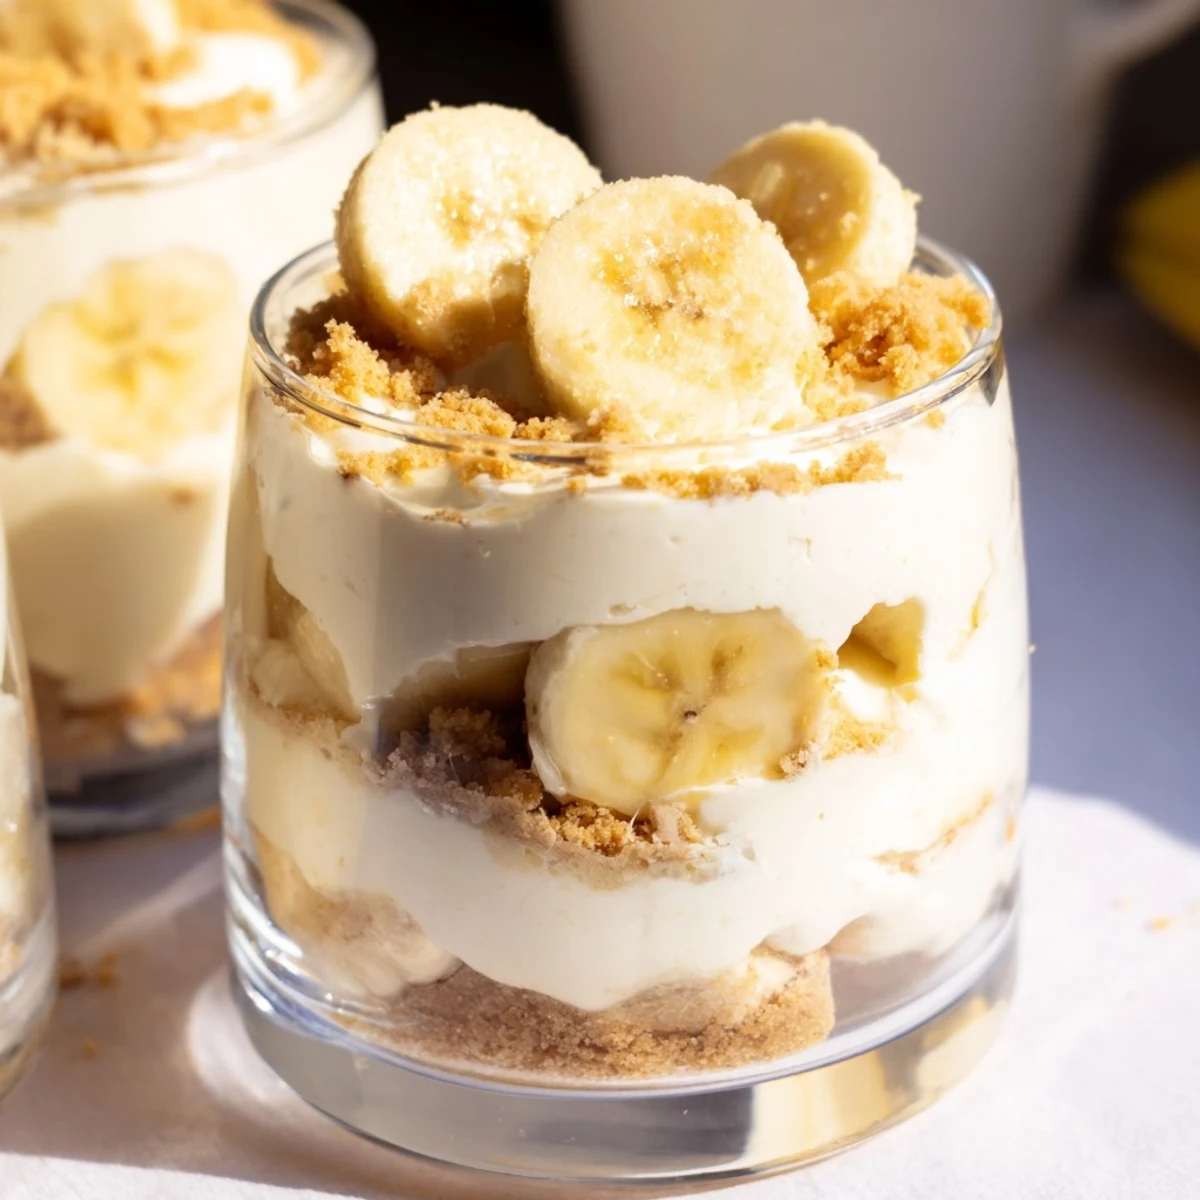
 These indulgent individual cups feature buttery vanilla wafer crusts topped with velvety cheesecake filling and luscious banana pudding. The creamy layers are complemented by fresh banana slices and crunchy wafer crumb toppings, creating a perfect balance of textures and flavors.
Each spoonful delivers the rich creaminess of cheesecake blended with the nostalgic sweetness of banana pudding—all without turning on your oven. Simply assemble, chill for two hours, and enjoy this crowd-pleasing dessert that's perfect for gatherings, potlucks, or whenever you crave something sweet and satisfying.
The first time I made these little cups, my kitchen counter looked like a disaster zone of crumbs and cream cheese splatters, but my roommate took one bite and literally did a happy dance right there in her socks.
I brought a batch to my sisters porch party last summer, and halfway through the evening, her normally reserved neighbor leaned over and whispered that hed eaten three of them when no one was watching.
Ingredients
- 1 cup vanilla wafer cookies, crushed: These humble cookies transform into something magical when crushed, creating that nostalgic nilla wafer flavor we all loved as kids
- 2 tbsp unsalted butter, melted: The glue that holds your crust together and adds that rich buttery foundation every good dessert needs
- 8 oz cream cheese, softened: Room temperature is non negotiable here or you will end up with tiny lumps that no amount of mixing can fix
- 1/3 cup granulated sugar: Just enough sweetness to balance the tangy cream cheese without making it cloying
- 1 tsp pure vanilla extract: Do not even think about using imitation vanilla, the real stuff is what makes these taste like they came from a fancy bakery
- 1 cup heavy whipping cream, cold: This must be screaming cold from the fridge or it will not whip up properly no matter how long you beat it
- 1 package instant banana pudding mix: The secret weapon that delivers that authentic banana pudding flavor without having to make a custard from scratch
- 1 1/4 cups cold whole milk: Whole milk creates the richest pudding layer, though you can get away with 2 percent if that is what you have
- 2 ripe bananas, sliced: Look for bananas with plenty of brown spots on the peel, that is when they are at their sweetest and most flavorful
Instructions
- Build the perfect crumb foundation:
- In a small bowl, combine those crushed vanilla wafers with melted butter until every single crumb looks evenly coated and smells like heaven.
- Create the silky cheesecake base:
- Beat the softened cream cheese, sugar, and vanilla until it is smoother than a jazz record, taking time to scrape down the sides so no lumps escape your notice.
- Whip some magic into the mix:
- In a separate bowl, transform that cold heavy cream into stiff peaks, then gently fold it into the cream cheese mixture like you are handling something precious.
- Whisk up the banana pudding layer:
- Combine the instant pudding mix with cold milk and whisk for exactly two minutes until it thickens into something that looks like edible sunshine.
- Start the beautiful layering process:
- Spoon about two tablespoons of your buttery crumbs into each serving cup and press down lightly with the back of a spoon to create a solid crust.
- Add the first creamy dreamy layer:
- Divide half of that gorgeous cheesecake mixture among the cups, spreading it gently over the crust in each one.
- Scatter some banana sunshine:
- Arrange a layer of fresh banana slices over the cheesecake filling, letting them peek out enticingly near the edges.
- Spoon on the pudding perfection:
- Divide that banana pudding evenly among the cups, spreading it carefully over the banana layer so everything stays neat and pretty.
- Crown with the final cheesecake layer:
- Top each cup with the remaining cheesecake mixture, smoothing it out to create that beautiful contrast between the white cream and yellow pudding peeking through.
- Finish with all the good stuff:
- Sprinkle each cup with extra wafer crumbs, add more fresh banana slices, and crown with a dollop of whipped cream if you are feeling extra fancy.
- Practice the hardest part:
- Cover and refrigerate for at least two hours, though honestly letting them sit overnight makes everything meld together in the most incredible way.
 Save to Pinterest
 My dad, who claims he does not even like dessert that much, ate two of these at our last family gathering and then asked if there were any leftovers he could take home in a napkin.
Making These Ahead
You can assemble everything except the fresh banana topping up to 24 hours in advance, which actually helps the flavors meld together beautifully. Just keep those banana slices protected until serving time to maintain that gorgeous fresh appearance.
Serving Suggestions
Clear glass cups or jars show off those beautiful layers and make these feel extra special. They are perfect for dinner parties because you can prep everything ahead and just pull them out when it is time for dessert.
Customization Ideas
Sometimes I add a sprinkle of cinnamon to the crust for a warm spice note that plays so nicely with the banana flavor. You could also drizzle some caramel sauce between layers or add a sprinkle of toasted nuts on top.
- A splash of banana liqueur in the cheesecake mixture takes these to grown up dinner party territory
- Try substituting graham crackers for half the vanilla wafers in the crust for a slightly different flavor profile
- For chocolate lovers, a tablespoon of cocoa powder in the cheesecake layer creates a chocolate banana version that is absolutely divine
 Save to Pinterest
 These little cups have become my go to whenever I need to bring something that looks impressive but does not require me to stress out in the kitchen for hours.
Recipe FAQ
- → How long do these need to chill before serving?
-
The cups need to refrigerate for at least 2 hours to allow the layers to set properly and flavors to meld together. For the best texture and taste, don't skip this chilling step.
- → Can I make these ahead of time?
-
Yes! You can prepare these cups up to 24 hours in advance. Store them covered in the refrigerator, but add fresh banana slices and wafer crumb toppings just before serving to maintain optimal texture and prevent browning.
- → How do I prevent banana slices from turning brown?
-
Toss the banana slices lightly in lemon juice before adding them to the cups, or add them right before serving. The citrus creates a protective barrier that slows oxidation and keeps bananas looking fresh.
- → Can I use homemade pudding instead of instant mix?
-
Absolutely! Homemade vanilla or banana pudding made from scratch works beautifully. Just ensure it's fully cooled and thickened before layering to maintain the proper texture in your cups.
- → What size serving cups work best?
-
Use 6-8 ounce individual dessert cups, mason jars, or ramekins. This size accommodates all three layers comfortably while leaving room for toppings without overflowing during assembly.
- → Can I substitute the vanilla wafers?
-
You can use graham cracker crumbs, digestive biscuits, or even Nilla wafers for the crust. Each option provides a slightly different flavor profile while maintaining the necessary crunch and buttery texture.