
 Save to Pinterest
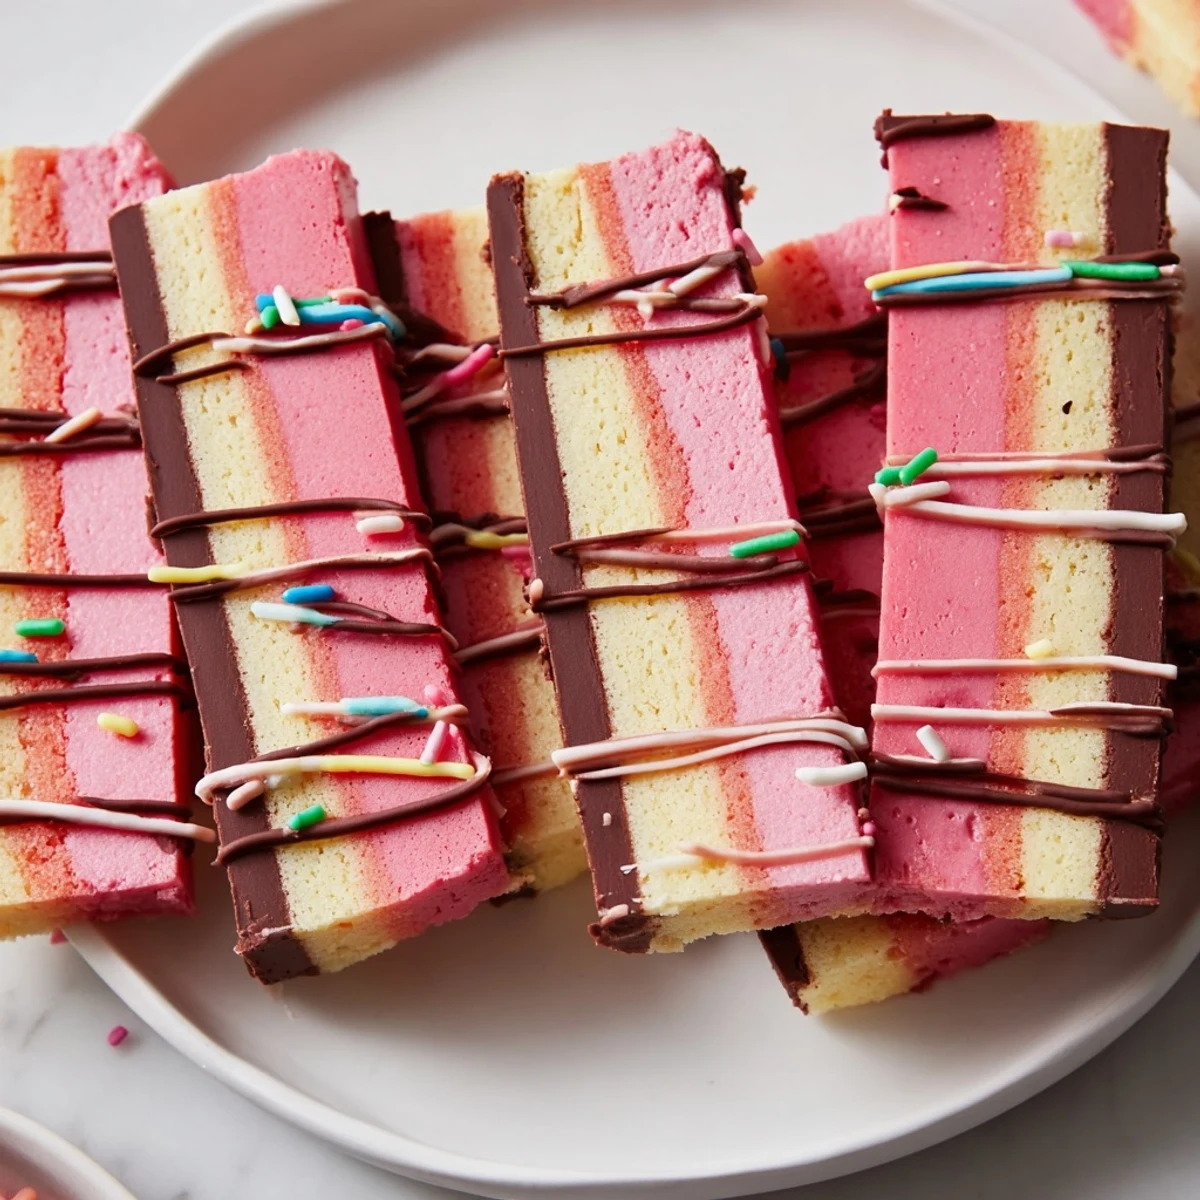
 These Neapolitan cookies bring together three classic flavors—chocolate, vanilla, and strawberry—in beautiful layered bars. Inspired by the iconic ice cream, each bite delivers a delightful combination of tastes and textures.
The dough is divided into three portions, each flavored and colored separately, then stacked and baked together. The result is a visually stunning treat that's perfect for parties, holidays, or anytime you want something special.
With a buttery, tender crumb and endless garnishing possibilities, these cookies are as fun to make as they are to eat.
The smell of three different doughs sitting side by side on my counter always throws me back to Saturday mornings at my Nonnas kitchen, where she let me pick which half of the ice cream carton was mine. Neapolitan cookies capture that same playful tug of war between chocolate, vanilla, and strawberry in one single bite. They look fussy, but the trick is really just patience and a good offset spatula. Once you pull that first perfect tricolor square from the pan, you will feel like a pastry genius.
I brought a tray of these to a neighborhood potluck last spring and watched a normally shy six year old grab three in a row before dinner. Her mother mouthed sorry across the lawn, but I just laughed because I would have done the same thing at her age. That moment reminded me why I love baking more than cooking: you hand people joy they can hold.
Ingredients
- Unsalted butter (225 g, softened): Good butter is the backbone here, so pull it out an hour ahead and let it come to room temperature naturally.
- Granulated sugar (300 g): Creaming this with butter until truly fluffy is what gives the cookies their delicate, tender crumb.
- Large eggs (2): Add them one at a time so the dough stays smooth and does not curdle.
- Vanilla extract (1 tsp): Use pure extract if you can because the vanilla layer relies on it entirely for flavor.
- All-purpose flour (340 g): Spoon and level rather than scooping to avoid packing too much flour into the dough.
- Baking powder (1/2 tsp): Just a touch gives the layers a tiny lift without puffing them out of shape.
- Fine salt (1/2 tsp): Salt sharpens every flavor, especially the chocolate, so do not skip it.
- Unsweetened cocoa powder (2 tbsp): Dutch processed gives a deeper color and smoother taste, but natural works fine too.
- Strawberry extract (1/2 tsp): A little goes a long way toward that nostalgic ice cream shop flavor.
- Pink or red food coloring (gel preferred): Gel coloring gives vibrant results without adding extra liquid to the dough.
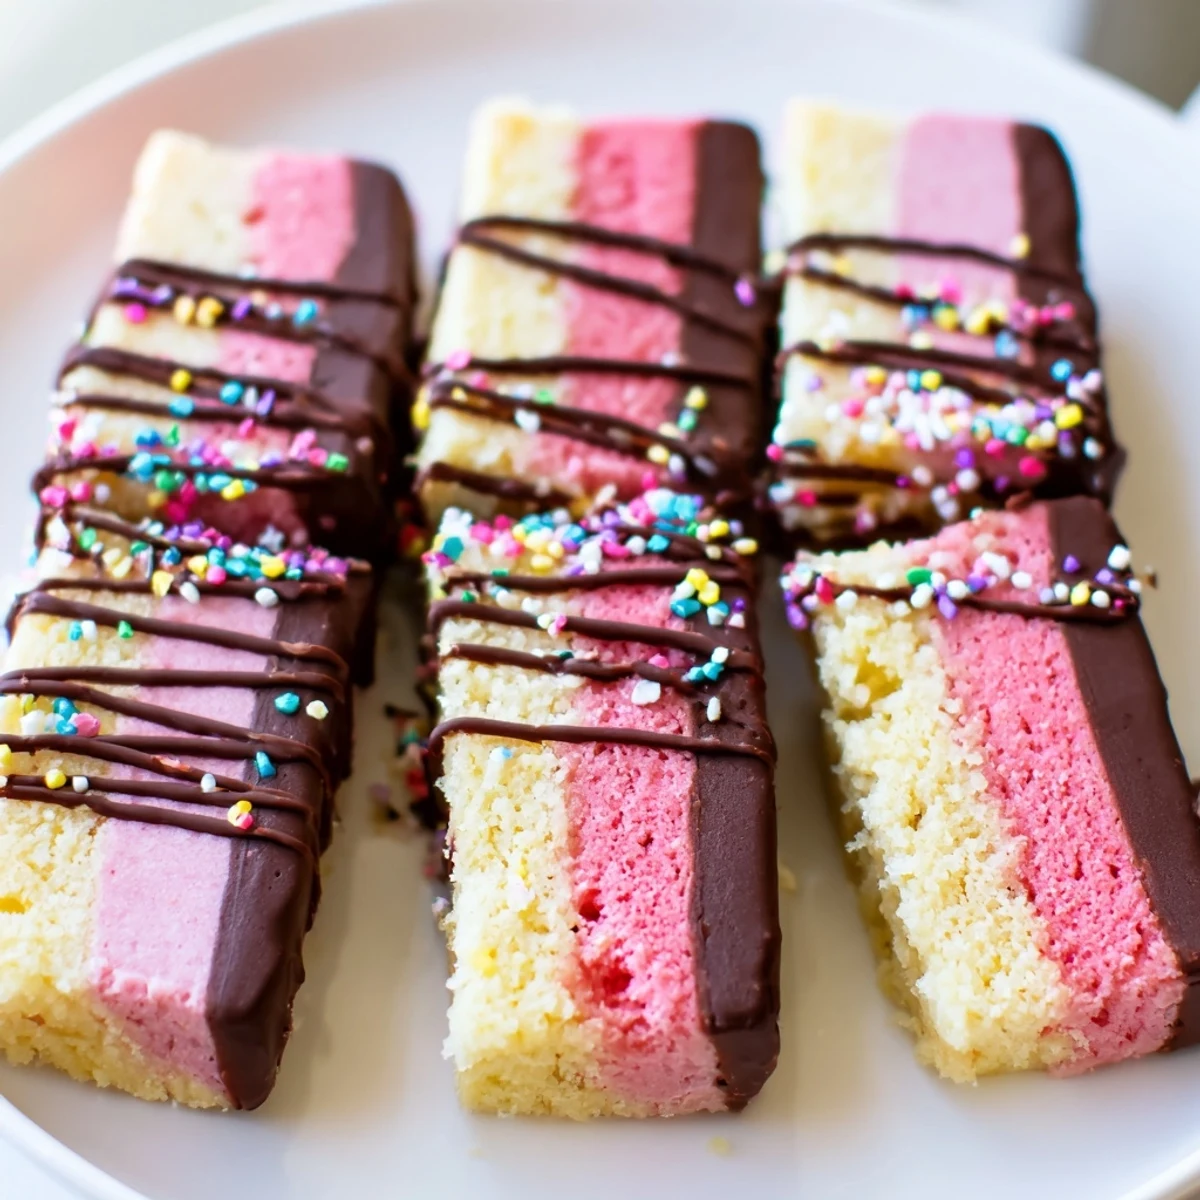
- Semisweet chocolate (100 g, melted, optional): A drizzle on top makes them gift worthy and adds a satisfying snap when you bite in.
- Sprinkles or chopped nuts (optional): Press these on while the chocolate is still wet for the prettiest finish.
Instructions
- Preheat and prepare the pan:
- Heat your oven to 175 degrees C (350 degrees F) and line a 23 by 33 cm baking pan with parchment, leaving overhang on two sides like handles.
- Cream butter and sugar:
- Beat the softened butter and sugar together until the mixture turns pale and looks almost whipped, about three minutes with an electric mixer.
- Add eggs and vanilla:
- Drop in one egg, beat until fully absorbed, then add the second along with the vanilla extract until everything looks silky.
- Incorporate the dry ingredients:
- Whisk flour, baking powder, and salt in a separate bowl, then gradually add to the butter mixture on low speed until a soft dough just comes together.
- Divide and flavor the dough:
- Split the dough evenly into three bowls, kneading cocoa into one, strawberry extract and coloring into another, and leaving the last bowl plain.
- Layer the doughs:
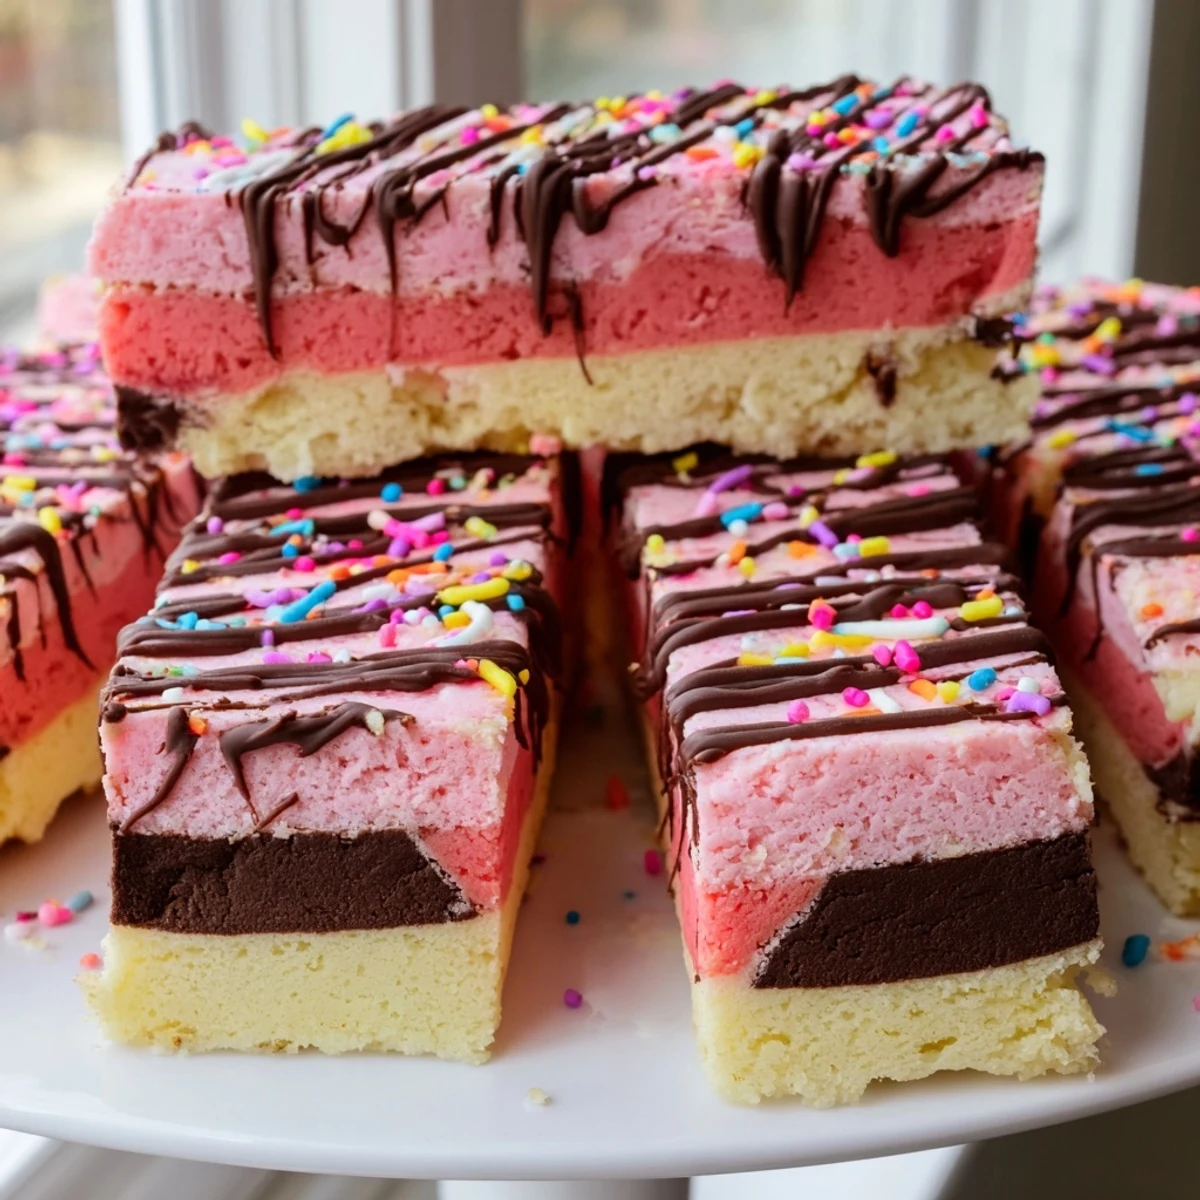
- Press chocolate dough flat into the pan first, smooth vanilla dough over it, then top with strawberry dough, using an offset spatula to keep each layer even.
- Bake until just set:
- Slide the pan into the oven for 12 to 15 minutes, watching closely so the edges barely darken and the center stays pale underneath the pink layer.
- Cool, slice, and decorate:
- Let the slab cool completely in the pan, then use the parchment handles to lift it out before cutting into squares and adding any melted chocolate drizzle you like.
 Save to Pinterest
 Last December I tucked a tin of these into a care package for a friend who had just moved across the country, and she texted me a photo of the empty tin at midnight saying she could not stop. That single message was worth every minute of layering and chilling.
Choosing the Right Pan and Parchment
A light colored metal pan conducts heat gently and helps the bottom layer bake evenly without darkening too fast. If you only have a dark or glass pan, knock the oven temperature down by about ten degrees and check a couple of minutes early. The parchment overhang is not optional in my kitchen because wrestling a delicate cookie slab out of a pan with a spatula is a recipe for heartbreak.
Getting Clean, Beautiful Slices
A sharp chef knife wiped clean between cuts gives you those bakery worthy edges that make people think you bought them. For the neatest results, chill the whole slab in the refrigerator for an hour before cutting, and use a gentle sawing motion rather than pressing straight down. The chocolate drizzle hides a multitude of imperfections, so do not stress if your first few squares look a bit rustic.
Making Them Your Own
Part of the charm of Neapolitan cookies is that the format invites endless creativity once you master the basic technique. You can swap strawberry for raspberry extract, add a layer of espresso dough instead of plain vanilla, or tint the middle layer green with pistachio flavoring for a holiday twist.
- Adding two tablespoons of finely ground almonds to any layer boosts flavor and adds a subtle, satisfying texture.
- Match your food coloring to the occasion: pastel shades for baby showers, bold reds and greens for winter celebrations.
- Always let the melted chocolate drizzle set completely before stacking or storing so the layers do not stick together.
 Save to Pinterest
 Every time I slice into a fresh batch, that tri-color cross section makes me grin like a kid staring into an ice cream case. Bake a pan this weekend and share them with someone who could use a little unexpected joy.
Recipe FAQ
- → Can I make the dough ahead of time?
-
Yes, you can prepare the dough and assemble the layers in the pan, then cover tightly and refrigerate for up to 24 hours before baking. You may need to add a couple of minutes to the baking time if baking straight from the refrigerator.
- → Why did my layers blend together?
-
Layer blending usually happens when the dough is too soft or pressed too firmly. Make sure each layer is pressed gently and evenly. Chilling the dough for 15 minutes between layers can help maintain distinct separations.
- → Can I freeze these cookies?
-
Absolutely. Once completely cooled and cut, store the cookies in a freezer-safe container with parchment between layers for up to 3 months. Thaw at room temperature for about an hour before serving.
- → What can I substitute for strawberry extract?
-
If you don't have strawberry extract, you can use raspberry extract or a concentrated strawberry jam with a little extra flour to compensate for the moisture. The flavor profile will shift slightly but still be delicious.
- → How do I get clean, even cuts?
-
Use a sharp knife and wipe it clean between each cut. For the neatest results, chill the fully cooled slab in the refrigerator for 30 minutes before cutting. A ruler can help ensure uniform portions.
- → Can I use natural food coloring instead of gel?
-
Yes, you can use natural food coloring, but the shade may be less vibrant. Beet powder or freeze-dried strawberry powder works well for the pink layer and adds extra flavor. You may need more than with gel coloring to achieve visible color.