 Save to Pinterest
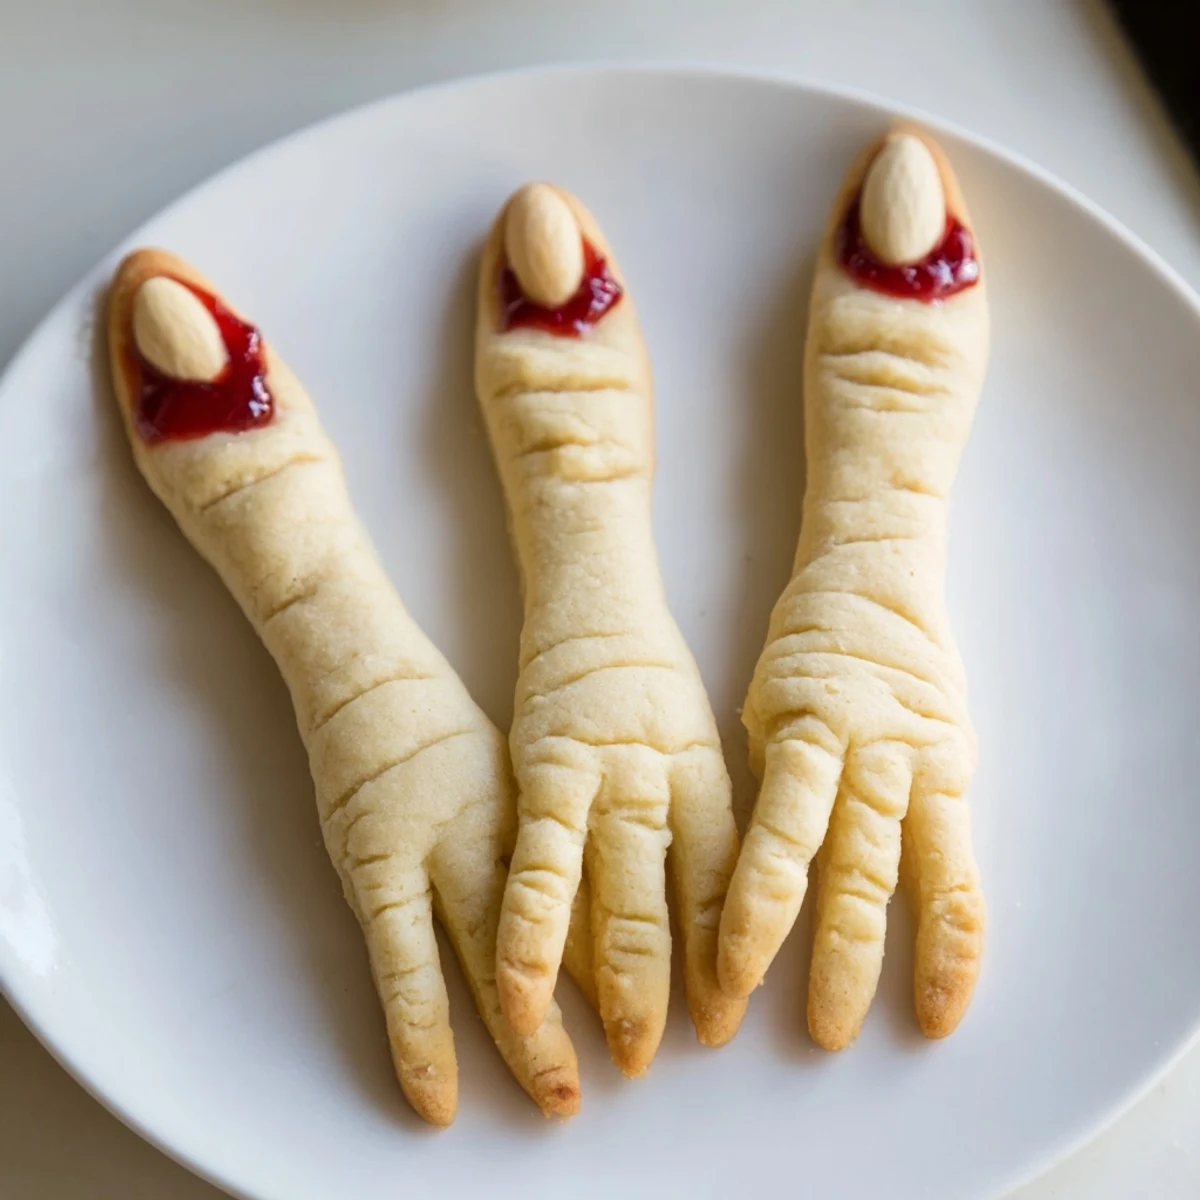
 Frightfully fun almond-flavored cookies shaped like witch fingers with blood-red fingernails. These spooky treats feature buttery vanilla-almond dough rolled into finger shapes, complete with knuckle details and blanched almond fingernails. The finishing touch of red gel or jam creates the perfect creepy effect. Ready in just 45 minutes, these yield 24 cookies and are vegetarian-friendly. Ideal for Halloween parties, autumn gatherings, or whenever you want to serve something delightfully disturbing. Kids and adults alike love the gruesome presentation and delicious buttery taste.
Last Halloween, my neighbor's kids couldn't stop giggling when I brought out a platter of these witch finger cookies. Something about the realistic knuckles and bloody almond nails had them simultaneously horrified and delighted. Even the parents hesitated before taking a bite, which is exactly the kind of playful reaction that makes Halloween treats so worth making.
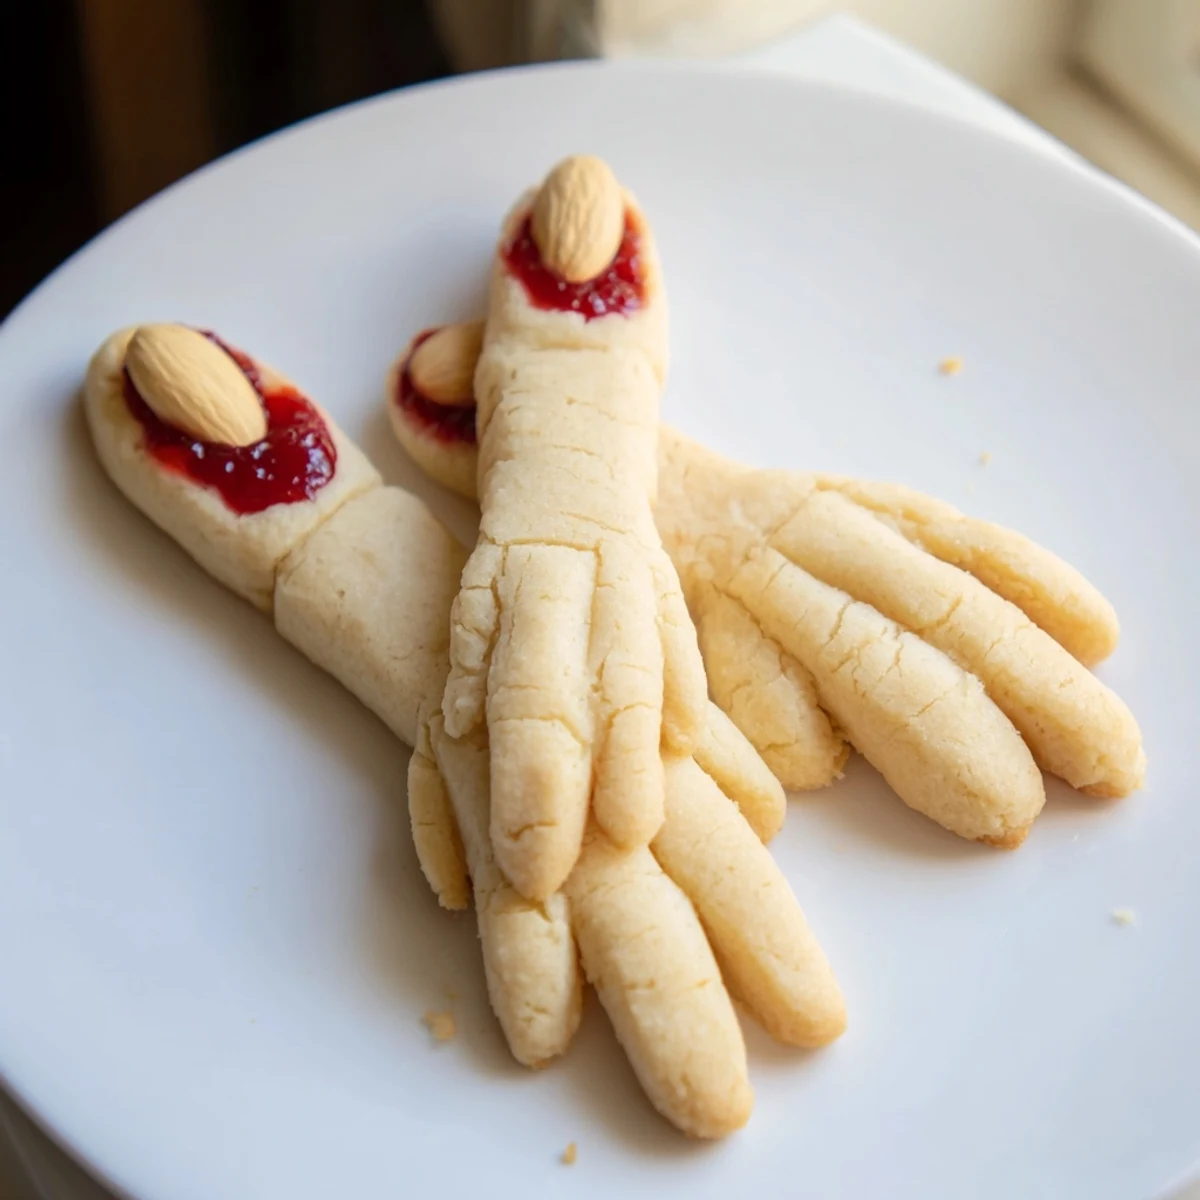
I learned the hard way that making these with kids requires extra patience. My niece got so into the knuckle detail that she spent twenty minutes on just one finger, creating elaborate arthritic textures that looked suspiciously realistic. We ended up with a batch that ranged from dainty witch fingers to impressively gnarled wizard hands.
Ingredients
- Unsalted butter: Make sure it's properly softened to room temperature so it creams easily with the sugar
- Granulated sugar: Creaming this thoroughly with the butter creates that light, tender cookie texture
- Large egg: Add this one at a time so it incorporates fully into the butter mixture
- Vanilla and almond extracts: This combination gives that classic sugar cookie flavor with a nutty undertone
- All-purpose flour: Measure this by weight if possible for the most consistent results
- Baking powder: This helps the cookies puff slightly without spreading too much
- Salt: Just a half teaspoon balances all the sweetness
- Blanched almonds: These work perfectly as fingernails and look striking against the golden dough
- Red gel coloring or jam: The jam creates a more realistic, sticky blood effect than plain food coloring
Instructions
- Get your oven ready:
- Preheat to 325°F and line two baking sheets with parchment paper so nothing sticks
- Cream the butter and sugar:
- Beat them together until the mixture looks pale and fluffy, which should take about 2 to 3 minutes
- Add the wet ingredients:
- Mix in the egg, vanilla extract, and almond extract until everything is fully combined
- Whisk the dry ingredients:
- In a separate bowl, combine the flour, baking powder, and salt so they are evenly distributed
- Make the dough:
- Gradually add the dry mixture to the wet ingredients, mixing just until a soft dough forms
- Shape the fingers:
- Roll about one tablespoon of dough into a 3 to 4 inch cylinder, then use a knife to create shallow knuckle lines
- Add the nails:
- Gently press a blanched almond into one end of each finger, wiggling it slightly so it stays in place
- Bake them:
- Place the fingers on the prepared sheets about 2 inches apart and bake for 18 to 20 minutes until lightly golden
- Create the bloody effect:
- Carefully remove the almonds, dab red food coloring or jam in the nail bed, then press the almonds back in place
- Let them cool:
- Transfer the cookies to a wire rack and let them cool completely so the bloody detail sets
 Save to Pinterest
 My sister served these at her Halloween party one year and people actually hesitated before grabbing one. The combination of realistic shaping and that glossy red jam around the nails makes them look convincingly gruesome, but one bite reveals the most buttery, almond scented cookie that disappears fast.
Getting Creative With Colors
I have tried tinting portions of the dough with pale green or gray food coloring for an even more undead look. The effect is striking, especially when you mix a few different colored fingers on the same platter.
Making Them Ahead
You can shape the raw fingers and freeze them on a baking sheet, then transfer to a bag for storage. Bake them straight from frozen, adding just a couple extra minutes to the baking time.
Presentation Ideas
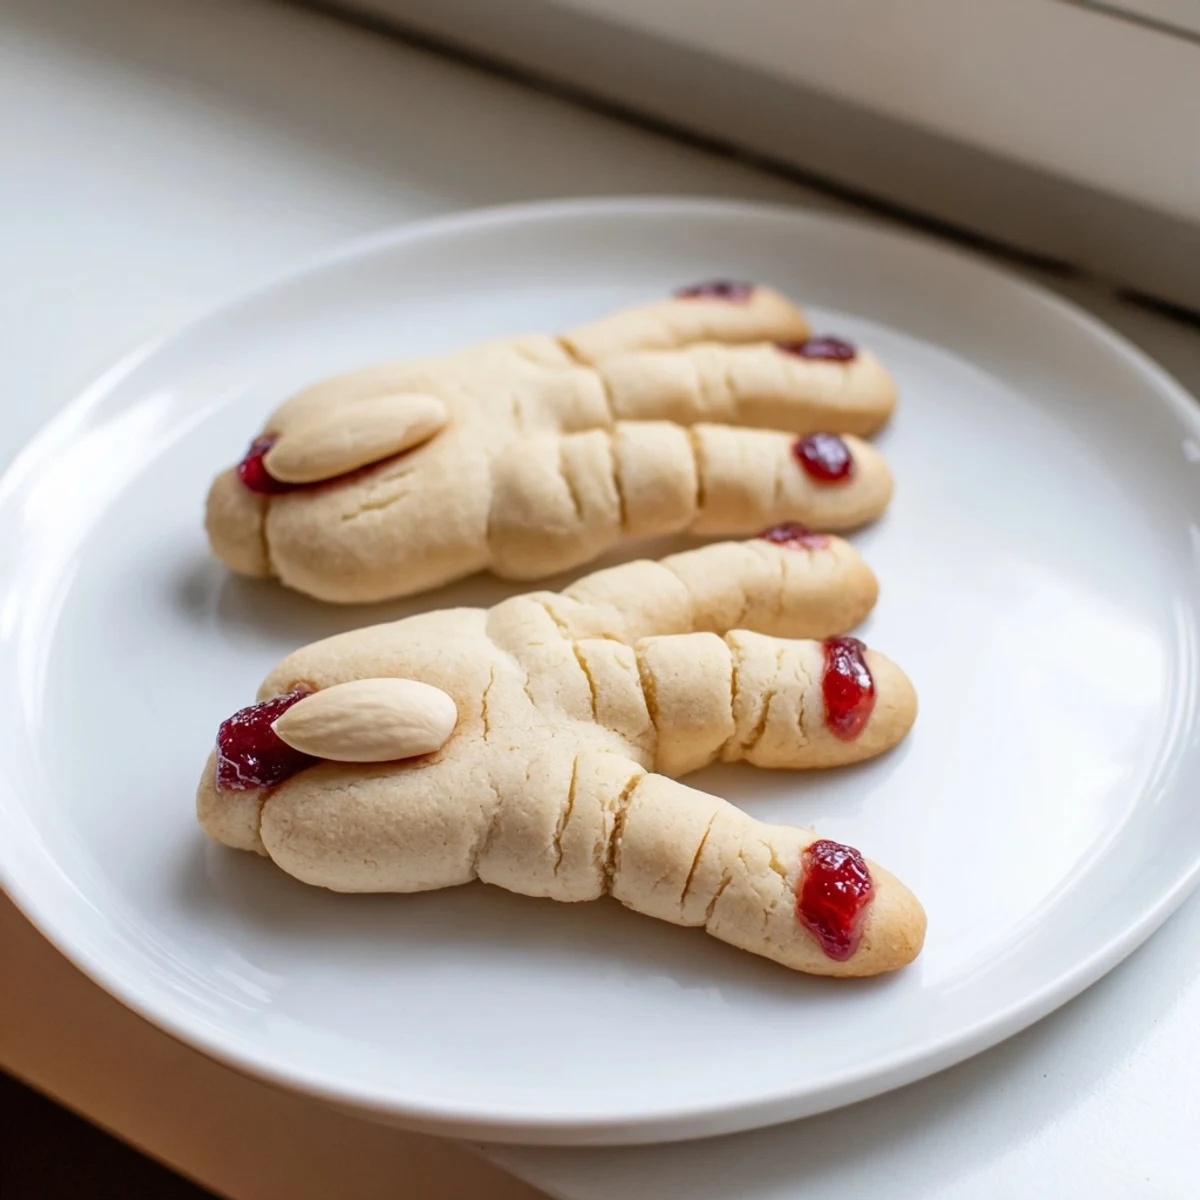
I have found that arranging these sticking out from a hollowed out pumpkin or serving them in a skull shaped dish makes them even more atmospheric. The presentation really elevates the creepy factor and gets everyone talking.
- Try positioning them so they are reaching toward guests from the serving platter
- Pair with dark berry cocktails or blood orange punch for a complete themed spread
- Keep some extra jam nearby for touch ups if the bloody effect fades over time
 Save to Pinterest
 These cookies have become the most requested item at every Halloween gathering I host, and I love how they transform a simple cookie dough into something delightfully spooky.
Recipe FAQ
- → How do I create the knuckle details on the finger cookies?
-
Use a small knife to gently score horizontal lines across the dough after rolling it into finger shapes. Press lightly to create indentations that resemble knuckles without cutting all the way through the dough.
- → What works best for the bloody fingernail effect?
-
Red gel food coloring provides the most realistic blood effect and won't soak into the cookie. Strawberry or raspberry jam also works beautifully and adds a sweet fruity note to the creepy presentation.
- → Can I make these cookies ahead of time?
-
Yes, you can prepare the dough and shape the fingers up to 2 days ahead. Store them in the refrigerator on parchment paper, then bake when needed. The blood effect works best on freshly cooled cookies.
- → How do I prevent the almond fingernails from falling off?
-
Gently press the blanched almonds into the dough before baking. After removing from the oven, apply the red coloring, then press the almond back in while the cookie is still warm to help it adhere.
- → What can I use instead of almond extract?
-
Lemon extract creates a bright citrus variation, or you can use additional vanilla extract for a classic buttery flavor. You could also try coconut extract for a tropical twist.
- → How should I store these Halloween cookies?
-
Keep them in an airtight container at room temperature for up to 5 days. Layer with parchment paper to prevent sticking. For longer storage, freeze undecorated cookies for up to 3 months.