 Save to Pinterest
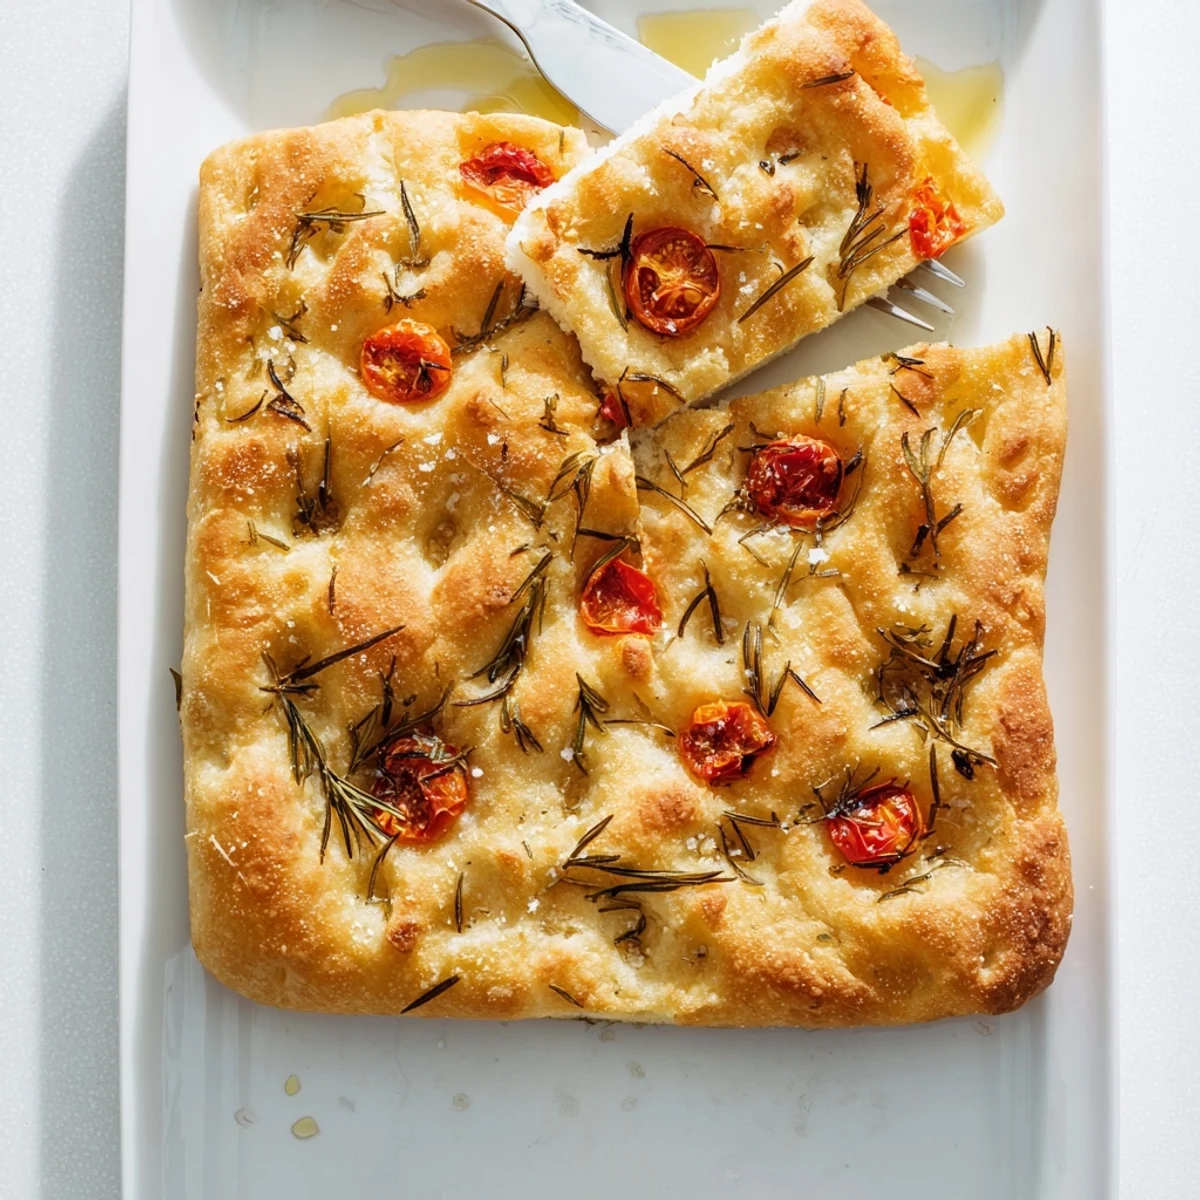
 Create authentic Italian focaccia at home with this traditional method. The dough develops beautifully through a two-hour rise, resulting in those signature airy pockets and irresistible texture. After kneading until smooth and elastic, the dough gets pressed into a baking sheet and generously dimpled by hand to capture pools of fragrant olive oil.
The magic happens during baking at high heat, creating that perfect contrast of golden, slightly crisp exterior and wonderfully soft, chewy interior. Fresh rosemary and flaky sea salt create the classic aromatic finish, though you can customize with olives, cherry tomatoes, or sun-dried tomatoes.
This versatile flatbread serves beautifully as an appetizer with dips, as a base for sandwiches, or simply torn and shared alongside soups, salads, or your favorite Italian dishes. Best served warm from the oven.
The apartment smelled like rosemary for three days after that first attempt, and honestly I was not mad about it. Focaccia had always been something I bought from the bakery down the street, assuming it required some mystical Italian grandmother magic I simply did not possess. Turns out the magic is mostly patience and an unreasonable amount of olive oil. This recipe changed my entire relationship with bread making.
I made this for a rainy Sunday dinner with friends once, and we ended up standing around the kitchen island tearing pieces off the tray before the pasta was even ready. There were supposed to be leftovers for sandwiches the next day. There were no leftovers.
Ingredients
- Bread flour (500 g): Bread flour gives that chewy, satisfying crumb. All purpose works in a pinch but you will notice the difference in texture.
- Salt (10 g): Do not skimp here. Salt strengthens the gluten network and balances the oil beautifully.
- Active dry yeast (7 g): One standard packet. Always check the expiration date because dead yeast has ruined many a baking day.
- Lukewarm water (325 ml): Think warm bath temperature, not hot. Water that is too hot kills the yeast instantly.
- Extra virgin olive oil (50 ml plus 2 tbsp): The oil goes into the dough and on top. This is not the place for your cheapest bottle.
- Sugar (1 tsp): Just enough to wake up the yeast and get things bubbling.
- Fresh rosemary (1 tbsp): Fresh is leaps ahead of dried here. If using dried, cut the amount to one teaspoon and rub it between your palms to release the oils.
- Flaky sea salt (1.5 tsp): The crunchy salt on top is non negotiable. Fine salt disappears into the bread and you lose that satisfying texture.
- Optional olives or cherry tomatoes: Ten to twelve pitted olives or halved cherry tomatoes pressed into the dough add bursts of flavor that make each bite a little different.
Instructions
- Wake up the yeast:
- Dissolve the yeast and sugar in lukewarm water in a small bowl and let it sit for ten minutes. It should become frothy and smell faintly like bread already. If nothing happens, your yeast is dead and you need to start over.
- Bring the dough together:
- Combine flour and salt in a large bowl, make a well in the center, and pour in the yeasty water along with 50 ml of olive oil. Stir until you have a shaggy, sticky mess that somehow promises to become something wonderful.
- Knead with conviction:
- Turn the dough onto a lightly floured surface and knead for eight to ten minutes until it transforms into something smooth and elastic. It will be tacky at first but resist the urge to drown it in extra flour.
- Let it rise:
- Place the dough in an oiled bowl, cover it with a damp cloth, and walk away for one hour. The dough should roughly double in size and look alive and pillowy when you return.
- Stretch and dimple:
- Grease your baking tray with olive oil, press the dough out to fit it, and use your fingertips to create those characteristic dimples across the entire surface. Press firmly but gently, as if you are playing a very relaxed piano.
- Dress it up:
- Brush generously with the remaining olive oil, scatter the rosemary and flaky salt over the top, and tuck olives or tomatoes into the dimples if you are using them.
- Second rise and bake:
- Let the dressed dough rise for twenty to thirty minutes until it looks puffy, then bake at 220 degrees Celsius for twenty to twenty five minutes until deeply golden. The bottom should sound hollow when tapped.
- Cool briefly and serve:
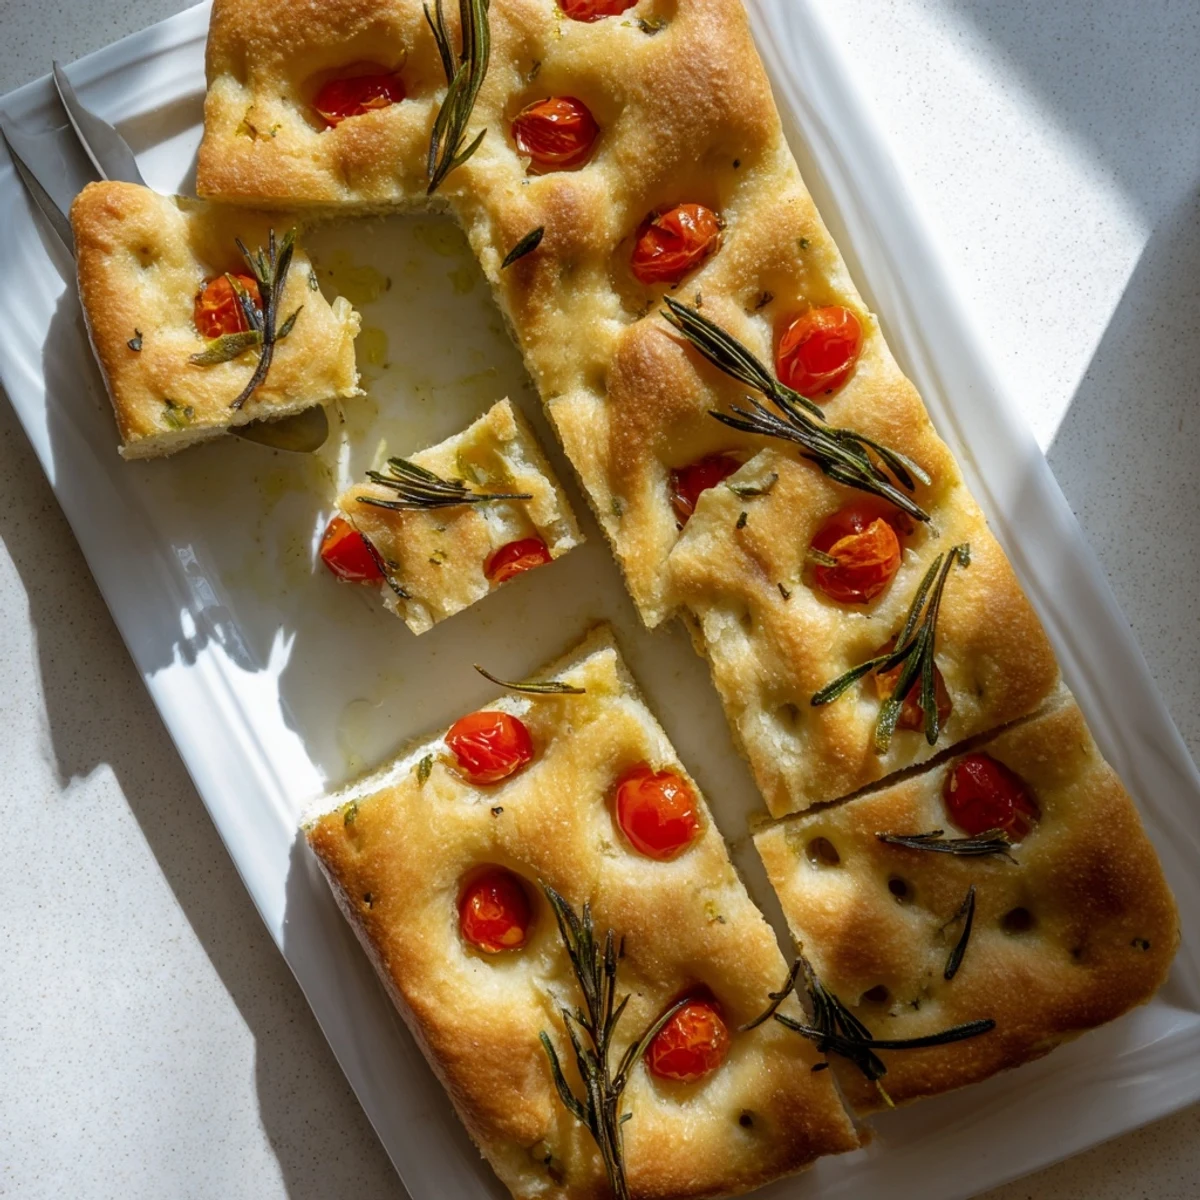
- Let it rest for just a few minutes on the tray so the crumb can settle. Slice into squares or just tear off pieces with your hands, which is honestly the more fun approach.
 Save to Pinterest
 The best focaccia I ever made was the one I almost ruined by forgetting it in the oven. Those extra three minutes gave it a deeply golden crust that I have been chasing ever since.
Flavor Variations Worth Trying
Once you have the base technique down, focaccia becomes a canvas. Thinly sliced red onions pressed into the dough before baking turn sweet and jammy in the oven. Sun dried tomatoes, caramelized garlic cloves, or a scattering of thyme and sage all work beautifully. Let whatever is sitting in your fridge guide you.
Serving Suggestions
Warm focaccia needs nothing but maybe a small dish of good olive oil for dipping. It pairs wonderfully with a bowl of minestrone, a simple arugula salad, or a plate of cured meats and cheeses. Leftover slices, if you have any, make extraordinary sandwiches the next day.
A Few Things I Learned the Hard Way
The dough will seem too wet at first and you will panic. Do not panic. Keep kneading and it will come together around the seven minute mark. Trust the process and keep your hands lightly oiled rather than reaching for more flour.
- Always preheat your oven fully before baking. A cold start means a sad, flat focaccia.
- Brush the oil on immediately after dimpling so it pools in the little wells and soaks into the bread.
- Cover any leftover focaccia tightly in foil and reheat in a low oven to bring back the crust.
 Save to Pinterest
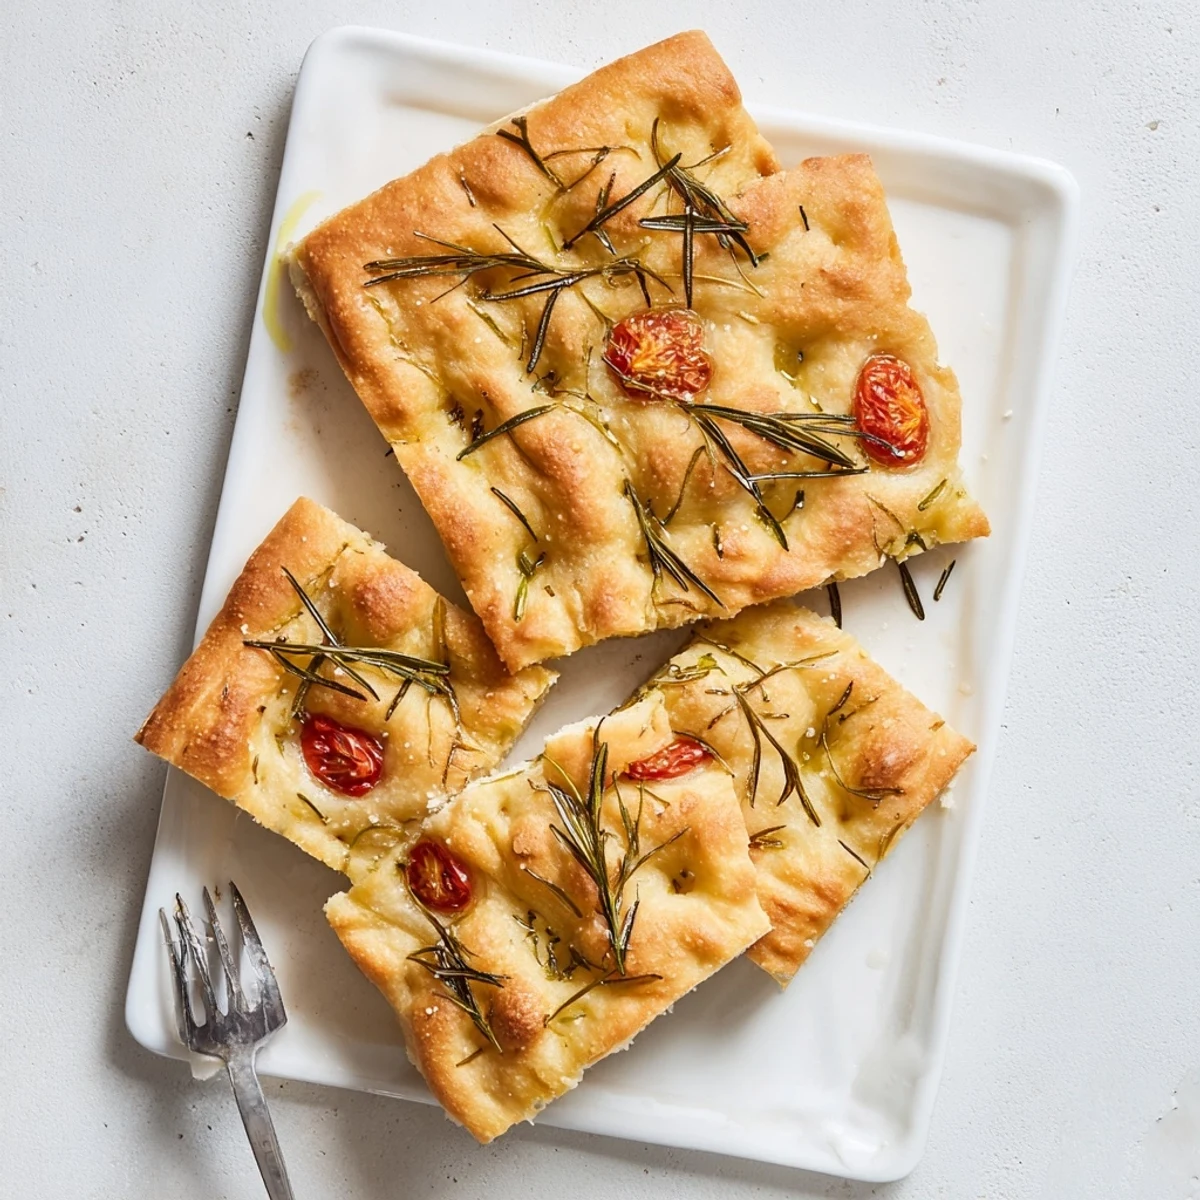
 Focaccia is less a recipe and more a reason to slow down and let something simple become extraordinary. Share it generously, because that is what bread is for.
Recipe FAQ
- → What makes focaccia different from regular bread?
-
Focaccia is a high-hydration Italian flatbread characterized by its dimpled surface and generous olive oil coating. Unlike regular bread, it's baked in a sheet pan rather than a loaf, creating a thicker, cake-like texture with a crispy bottom and soft, airy interior. The olive oil not only adds flavor but also creates those signature golden, slightly crispy edges.
- → Why do you dimple focaccia dough?
-
Dimpling focaccia with your fingertips serves two purposes. First, it creates those characteristic wells that hold olive oil and toppings, ensuring even distribution of flavor. Second, it helps maintain the bread's airy texture by preventing the dough from rising too much and becoming dense. The dimples also create more surface area for that delicious golden crust.
- → Can I make focaccia dough ahead of time?
-
Absolutely. You can prepare the dough and let it complete its first rise, then refrigerate it for up to 24 hours. The cold fermentation actually develops more complex flavors. When ready to bake, bring the dough to room temperature, press it into your pan, and proceed with the second rise and baking. This makes it perfect for entertaining or meal prep.
- → What toppings work well on focaccia?
-
The classic combination is rosemary and flaky sea salt, but focaccia is incredibly versatile. Try fresh thyme, oregano, or sage instead of rosemary. Add halved cherry tomatoes, pitted olives, caramelized onions, sun-dried tomatoes, or even thin slices of garlic. For a sweeter version, grapes and rosemary create a delicious contrast. Just avoid overloading, as too many toppings can make the dough heavy.
- → How do I know when focaccia is done baking?
-
Your focaccia is ready when it's deeply golden brown across the top surface and the edges are pulling away slightly from the sides of the pan. The bottom should sound hollow when tapped. An instant-read thermometer inserted into the center should read about 200°F (93°C). If you're unsure, err on the side of slightly longer baking for that crispier exterior that makes focaccia so irresistible.
- → Why is my focaccia dense instead of fluffy?
-
Dense focaccia usually results from not letting the dough rise long enough or using too much flour during kneading. Ensure your yeast is fresh and active—look for that frothy layer after blooming. Don't skip the full rising times, and avoid adding excess flour when shaping. The dough should feel tacky and somewhat sticky, not dry. Proper hydration is key to achieving those coveted airy pockets.